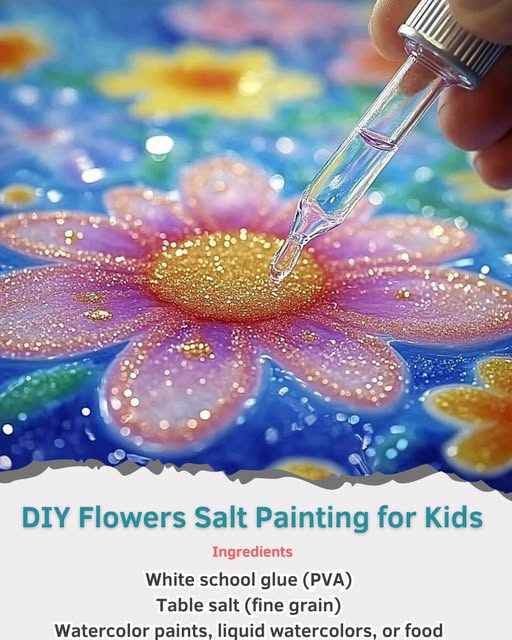
Ingredients:
– White school glue (PVA)
– Table salt (fine grain)
– Watercolor paints, liquid watercolors, or food coloring mixed with water
– Paintbrushes, pipettes, or droppers
– Heavyweight paper (watercolor paper or cardstock)
– Small cups or palette for paints
– Tray or newspaper (to catch extra salt)
Directions:
1. Start by laying out all your ingredients and materials on a flat workspace. This will help you stay organized throughout the project.
2. On the heavyweight paper, use white glue to draw simple flower shapes. You can create stems, leaves, petals, and even sun rays if you like! Make sure to apply the glue in lines thick enough so that the salt will adhere well.
3. While the glue is still wet, sprinkle salt generously over the glued lines. Ensure that you cover all the glue with salt. After sprinkling, gently shake off the excess salt onto a tray or newspaper so you can reuse it later.
4. Using a paintbrush, pipette, or dropper, carefully drop watercolor paint onto the salted lines. Watch as the color spreads and flows along the salt—this part is particularly mesmerizing!
5. Allow your masterpiece to dry flat for a few hours or overnight. Be careful not to move the paper until it is completely dry to keep the salt design intact.
6. Once your painting is dry, feel free to hang it on the wall, display it in a window, or add it to your art collection!
Tips & Variations:
– Before adding glue, use a pencil to outline your flower shapes. This will give you guided shapes to follow.
– Experiment with other nature scenes like trees, butterflies, or bees to create a full garden. You can also add glitter to the salt for an extra sparkly effect to enhance your artwork!
